As a Biomedical Engineer active since 2017, I have witnessed the rapid transition from basic thermal cyclers to high-throughput Real-Time PCR (qPCR) systems. While clinicians focus on the “Positive/Negative” results, the engineering behind the DNA amplification process is a marvel of thermal precision and optical sensitivity.
In this guide, we will break down the working principles, common technical failures, and the rigorous calibration required to keep these machines diagnostic-ready.
1. The Core Principle: It’s All About Thermal Cycling
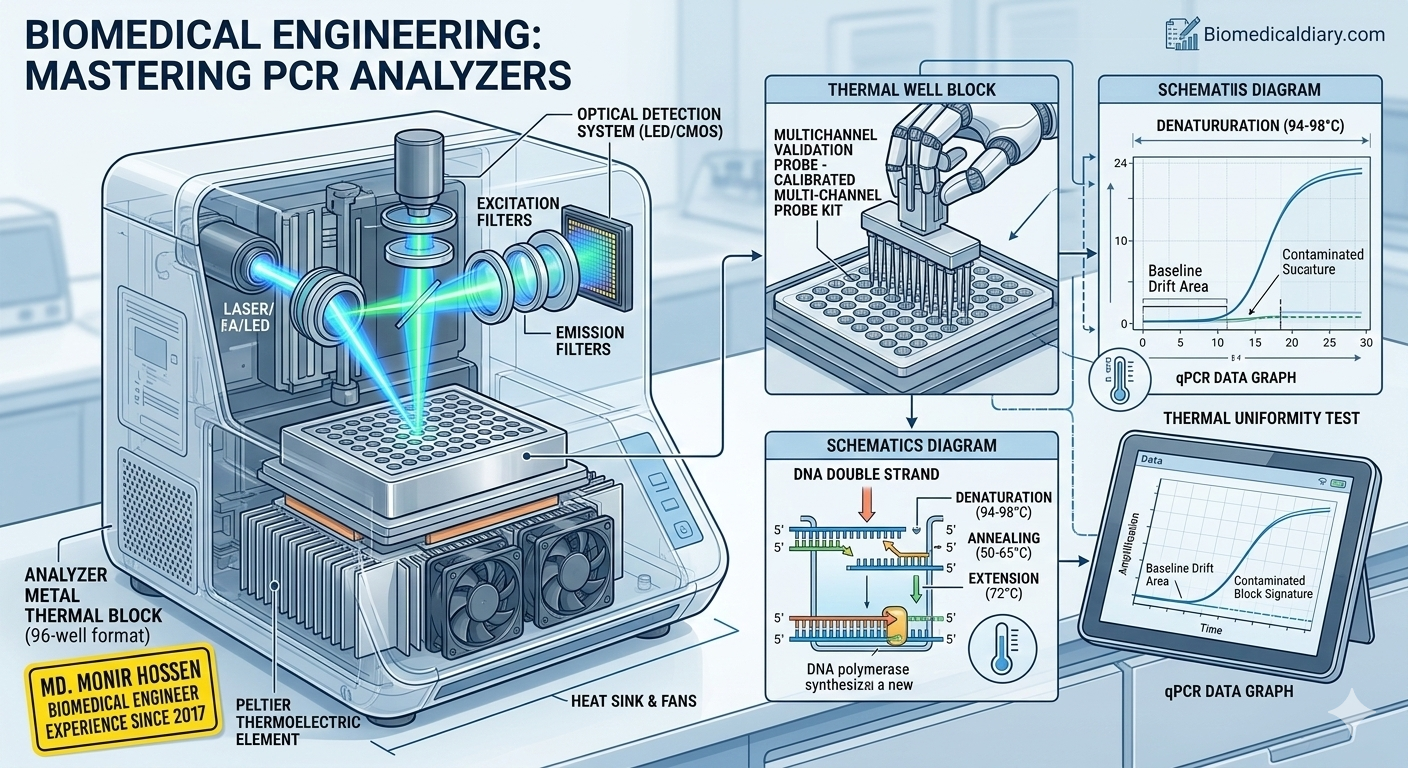
At the heart of every PCR analyzer is the Peltier Element. This thermoelectric cooler is responsible for the rapid heating and cooling cycles required for the three stages of PCR:
-
-
Denaturation (94°C–98°C): Breaking the DNA double strand.
-
Annealing (50°C–65°C): Primers binding to the single strands.
-
Extension (72°C): DNA polymerase synthesizing the new strand.
-
The Engineering Challenge: The block must reach these temperatures with an accuracy of ±0.1°C. Even a slight “Thermal Drift” can lead to non-specific amplification or complete test failure.
2. Real-Time PCR vs. Traditional PCR
The biggest leap I’ve seen in the field is the integration of Optical Detection Systems.
-
Traditional PCR: Requires gel electrophoresis after the run to see results.
-
Real-Time PCR (qPCR): Uses a laser or LED light source and a CMOS/CCD camera to detect fluorescent signals during the cycle.
As an engineer, this means you are no longer just maintaining a heating block; you are maintaining a high-precision spectrophotometer.
3. Common Technical Errors and Troubleshooting
A. “Heater Block Temperature Error”
If your analyzer fails to reach the set temperature or takes too long (Ramp Rate failure), the problem is usually hardware-related.
-
Root Cause: Failure of the Peltier module or the Thermal Grease (Heat Sink Compound) drying out. Over time, the contact between the Peltier and the heat sink degrades.
-
Engineering Fix: Disassemble the thermal block, clean the old compound with Isopropyl Alcohol, and apply a fresh layer of high-conductivity thermal paste.
B. “Baseline Drift” or “High Background Noise”
In qPCR, if the amplification curve looks “shaky” or the baseline is too high, the optical path is likely compromised.
-
Root Cause: Dust on the excitation filters, a dying LED light source, or a contaminated sample block.
-
Engineering Fix: Clean the optical lenses with lint-free wipes and specialized lens cleaner. Check the “Lamp Hours” in the service menu—if the LED/Halogen bulb has exceeded its lifespan, its intensity will fluctuate, causing noise.
C. Lid Temperature Alarms
The heated lid (usually set to 105°C) prevents evaporation of the sample.
-
Root Cause: Blown thermal fuse or a broken wire in the lid hinge due to constant opening and closing.
-
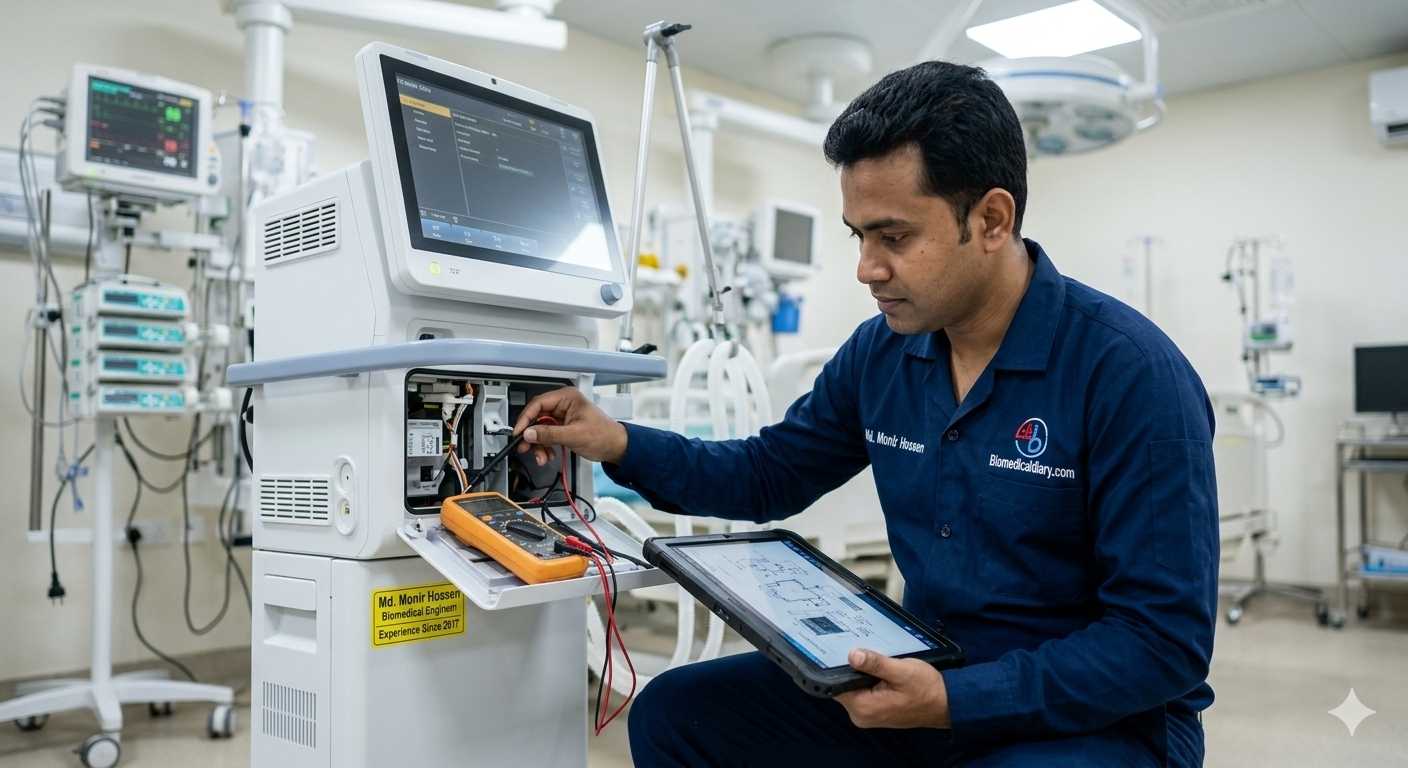
Engineering Fix: Use a multimeter to check for continuity in the lid heating element and the thermistor.
4. Professional Calibration and Validation (IQ/OQ/PQ)
To satisfy international standards like ISO 15189, a Biomedical Engineer must perform regular validation.
Thermal Validation
We use a Multi-channel Temperature Validation System. This involves placing calibrated probes into the wells of the block to ensure “Thermal Uniformity.” If the center of the block is 60°C but the corners are 58°C, the results across the plate will be inconsistent.
Optical Calibration
Using “Calibration Plates” (containing known concentrations of dyes like FAM, VIC, or ROX), we perform a Pure Dye Calibration. This teaches the machine’s software how to distinguish between different fluorescent colors.
5. Preventive Maintenance (PM) Checklist
To prevent downtime, I recommend the following quarterly schedule:
-
Internal Cleaning: Vacuum the cooling fans. Dust buildup is the #1 cause of Peltier overheating.
-
Well Cleaning: Use 10% Bleach followed by Ethanol to remove any DNA contaminants from the block wells.
-
Self-Test Logs: Review the internal error logs for any “Communication Errors” between the PC and the Analyzer.
Conclusion: The Engineer’s Responsibility
PCR analyzers are the backbone of modern molecular biology. Since I started my journey in 2017, I’ve learned that the secret to a long-lasting analyzer isn’t just repair—it’s Environment Control. Keeping these machines in a dust-free, temperature-controlled room is 50% of the maintenance work.
For deeper technical discussions or service manual requests regarding specific brands (like Bio-Rad, Roche, or Thermo Fisher), feel free to reach out.
Md. Monir Hossen Biomedical Engineer Email: monir@biomedicaldiary.com